Spicy Chickpea Spread

This is not a revolutionary recipe. (Truth be told, I made it one day because I didn’t have any tahini and was too lazy to use my blender.) But maybe you need a little something different. This chickpea spread reminds me of a Mahón & chickpea cheese spread that I used to buy at Stinky Brooklyn cheese shop over on Smith St. in Carroll Gardens. (Sadly, Stinky Brooklyn are no more). It comes together quickly and then you can enjoy it as a sandwich spread or a dip with substantial crackers.

Ingredients:

  • 1 can of chickpeas, rinsed, drained
  • 1-2 TB olive oil
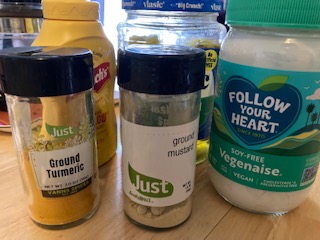
  • 1 TB or so of Nutritional yeast (eyeball it)
  • Crushed red pepper flakes
  • Tajin

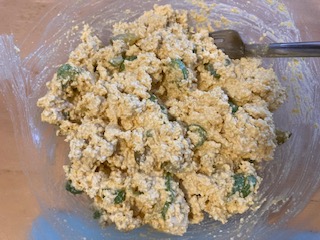
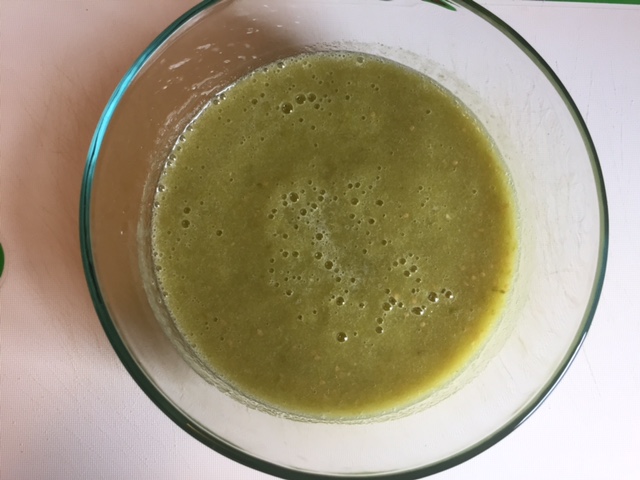
Put chickpeas in a bowl and mash up with a fork. You can leave slightly chunky; it doesn’t have to be a smooth paste. Add remaining ingredients and mix. Adjust spices to your liking.

I guessed on the measurements for olive oil and nutritional yeast and spices. You can make it super spicy, or not. It’s up to you. Trust yourself. There is really no way you can mess this up!

Vegan “Egg” Salad

Maybe you don’t like eggs, have an allergy, or are vegan….well, this recipe is for you!

  • 1 pkg firm or extra firm tofu, drained
  • 2 stalks celery, chopped
  • 1 dill pickle, chopped
  • 1/2C – 3/4C vegan mayo
  • Dried yellow mustard
  • Turmeric
  • French’s yellow mustard
  • salt

Directions:

Drain tofu. I do this by putting it in a fine mesh strainer over a large bowl and, using paper towels press out all the excess liquid. (You don’t want watery “egg” salad. Then I toss the excess liquid and use the same bowl to mix the ingredients together. You can also buy one of those tofu presses. Actually, I might buy one of those as I think I’d get a lot of use out of it.

Mash up tofu with fork, add the rest of the ingredients. Add the vegan mayo a little bit at a time; you don’t want soupy egg salad. Trust your instincts when it comes to adding ingredients. I also added a couple teaspoons of pickle juice. (Some recipes I saw online had you adding vinegar. Why? Vegan mayo already has apple cider vinegar). I like the tang from the pickle juice.

This makes a LOT. Probably will last a week.

You’re done! I like to eat the egg salad on crackers or on a toasted bagel. Now that I figured out how to make this I won’t have to buy it pre-packaged from the store any more! Woo!

Refrigerator Pickles

Yes, I do own a Paul Frank Pickle Pants wallet. It’s one of my favorite Paul Frank designs ever.

Paul Frank pickle wallet

My coveted Paul Frank wallet.


I loved pickled vegetables. Okra? Yes. Green Beans? Check. Carrots? Peppers? Yes! But mostly, I love pickles in their original cucumber form. My grandma used to can pickles and beets and store them in her cellar. That was an all day process and I didn’t really want to do that right now. I wanted something that could be made quickly and easily. So, I decided to make some refrigerator pickles. I started with plain, dill pickles:

first foray into refrigerator pickles!

My very first jar of pickles, ready to go into the fridge.

They turned out really well. So, I decided to make a couple more jars: dill and then a jar of spicy garlic pickles:

Spicy garlic pickles.

Spicy garlic pickles.

You can make as little or as much as you wish. It’s only me here, so, I make one or two jars at a time. These keep in the fridge for a week. This recipe doesn’t require sterilizing jars and lids, but, please make sure you have super clean jars/lids. I used Ball 16oz mason jars.

Quick and Easy Refrigerator Pickles

  • 2-3 Kirby cucumbers, thoroughly washed
  • 1-2 TB salt
  • White distilled vinegar
  • sprig of dill, chopped

Wash the cucumbers and slice into 1/8th inch pieces, pack tightly into the jar until they reach the lip of the jar. Pack those suckers down. Add the dill and salt (you may want to start out with less salt, it’s up to you. You can also add a clove of garlic or teaspoon of crushed red pepper flakes if you’re making spicy pickles). Then, pour vinegar over cucumbers, leaving a little room at the top. Screw lid on tightly and shake jar to mix up salt, dill, etc. Put in refrigerator and remember to shake the jar every few hours. You will have pickles in about 4-5 hours, or, leave overnight and enjoy the next day. Really, you can’t go wrong here.

dill & spicy garlic pickles

Sunday pickle making. Yay!

Avocado Tomatillo Salsa

Why buy salsa when you can make your own? Well, at least, that’s what I think. I haven’t really found a good enough (IMO) tomatillo salsa at the store, so, I made my own. Bring this to a BBQ and you’ll make some new friends and keep your old ones.

  • 4-5 medium size tomatillos
  • 1 jalapeño
  • 1 avocado, mashed
  • handful of cilantro
  • dash of salt (optional)

Directions:

-Remove the husks from the tomatillos and thoroughly rinse off the sticky residue.

-Place tomatillos and jalapeño in medium-sized pot, cover with water and bring to a boil. Turn down the heat and let them simmer for about 5-7 minutes, or, until the skins wrinkle a bit and they are soft.

-Drain in a colander and let sit for a few minutes so they cool off a bit.

-Place tomatillos and pepper in a blender or food processor, along with a dash of salt, lime juice and cilantro. Process until blended.(It won’t take long). A word of caution: be careful and don’t stick your face over the bowl/blender after you’ve removed the lid to smell the salsa because one will be hit with the full on power of the jalapeño scent like a brick wall (my eyes were burning, lesson learned!).

-Put salsa in container and in the fridge to cool off even more. Once chilled, add the mashed avocado & stir. All done.

Now, go grab a beer, or a glass of rosé and some chips and enjoy.

tomatillos and peppers

So pretty!

salsa, pre avocado

Browned Butter Cornbread

browned butter cornbread

Browned butter cornbread, hot out of the oven.

I’m pretty sure that my great-grandmother from Shelbyville, TN never made cornbread with browned butter, or, without bacon grease/fat for that matter. Well, I did adhere to one Southern tradition when I made my version of cornbread: no sugar. I’m not a fan of sweet cornbread, I it like more savory. But, if you like a slightly sweeter bread, by all means, add the tablespoon of sugar. Also, I think the browned butter adds a deeper, nuttier flavor to the cornbread. I think the next time I make this I’ll add some grilled corn off the cob. I only had some sad, old frozen corn, which, after heating up in the microwave tasted like, well, old corn (yuck). I suppose I should clean out my freezer….but, that’s for another day!

*Recipe slightly adapted from Paula Deen

  • 6 TB unsalted butter, browned, plus butter for baking dish
  • 1 C cornmeal
  • 3/4 C AP flour
  • 1 TB sugar (Optional)
  • 1 1/2 tsp baking powder
  • 1/2 tsp baking soda
  • 1/4 – 1/2 tsp salt
  • 2 large eggs, lightly beaten

Preheat oven to 425 degrees

Brown your butter and set aside to cool.

That extra 2 TB of butter you have from the stick you cut earlier? Use that, or most of it to grease your 8×8 baking dish.

Mix all dry ingredients into a large bowl, set aside. Once the browned butter is cooled, add the slightly beaten eggs and buttermilk, stir. Then add wet ingredients to dry and mix well, making sure you get out all the dry parts (you don’t want any pockets of batter with dry bits because nothing is more gross than biting into a baked good and getting a bite with dried bits of flour.) The batter will be slightly lumpy and that’s okay. Bake until top is golden brown, about 20-25 minutes, depending on how hot your oven is. Mine took exactly 20 min. Let it cool and then eat. I’m going to have mine with a bowl of vegetarian chili for dinner.